Thursday 28 April 2016

Orange, Almond and Hazelnut Cake from April's Cook Book Club


Here it is... as requested by many, many people.   The Josordoni Claudia Roden Orange  x Tarta Santiago F1 hybrid cross cake as presented to, and approved by, Sr Jose Pizarro at Thane Prince's inimitable Cook Book Club.


I warn you now, it uses rather a lot of different whisks and processors and stuff. So make sure the dishwasher is empty, or that the sink is full of soapy water in readiness. 
125-130g orange pulp (roughly equivalent to the pulp of one orange)
100 g ground almonds
100g ground roast hazelnuts
50g chopped roast hazelnuts
250g caster sugar - split into 2 portions of 125g each
Zest of 2 oranges
quarter teaspoon vanilla extract
quarter teaspoon orange extract - the best you can find, if you don't have an excellent one then omit it.
2 teaspoon orange flower water
5 eggs, separated
Firstly, make your orange pulp in advance as you will want it to cool. Because of the amount of time and energy used, I boiled 5 medium sized oranges, then pulped them, cooled the pulp, split it into 5 and froze in individual portions. You need to cover your whole, unpeeled oranges with water and boil for approx 2 hours until a skewer will go through the orange with no effort at all - you can pressure cook for 20 mins if you prefer. 
Slice the oranges in half horizontally, and flick out any pips. Check the little stalk buttons have been removed.
Put the oranges into a food processor and process until you can no longer see any large pieces of peel through the side of the processor bowl. 
Allow to cool, then remove 130g for today, and portion and freeze the remainder. I made my cake with frozen and defrosted pulp to check it would work ok; it is fine. You will find as it defrosts that the juice separates out a bit, but just use a fork to mix it all together again.

Grease and line (base and sides) a cake tin, either an 8" square or an 8" springform, depending on what you have.

Preheat the oven to Gas mark 4 180F 160C In a clean and dry food processor, put the ground nuts and one portion of sugar and blitz it together to get rid of any lumps and blend the two together nicely. Then add the chopped hazelnuts. Put this mixture to one side, and get rid of the food processor. You won't need it again, and it takes up a lot of room.

Next, I like to use a hand held mixer for whisking the egg whites and yolks. You can use a stand mixer if you like, but I find that a hand held is easier, as I need to have the eggs in two different bowls, and I only have one bowl that fits my Kenwood. You want clean dry beaters for the egg whites, so I do them first. The slight separation in the meringue whilst you whisk up the egg yolks won't make too much difference. If you have two sets of whisks, you could do the yolks first, then you'd be sure you wouldn't lose any bulk in the whites. Your choice.

Whisk up the egg whites, then, to a nice, thick meringue, but stop before it gets to stiff peaks. (You want a bit stiffer than soft peaks, but they should still have a bit further to go. This means they still are able to expand in the oven, and this helps the cake to rise and not have a sad middle bit. )
In an another bowl, mix the egg yolks with the 2nd portion of caster sugar, until they are thick and form  a ribbon that stays on the surface for a moment when you lift the whisk. They don't need to be a really white mousse,  you don't want the egg whites to wait around too long if you don't have two whisks...

Thoroughly fold the orange pulp, the zest, the essences and the orange flower water into the egg yolk mixture.  Add the nut/sugar mixture and fold in. Add 2 tablespoons of egg white and mix this in thoroughly, to help slacken the mixture. Then add all the rest of the egg whites in one go, and fold in carefully. You want to lose as little bulk as possible - these are your only raising agent, after all. The mixture should look very airy and mousse like.

Pour the mixture into the prepared cake tin, it shouldn't be very deep - too thick and it takes an age for the middle to cook, which makes the edges dry out too much.  Put the tin on a central shelf, and cook for 30-35 minutes - a skewer should come out clean from the middle of the cake, and it should have shrunk very slightly from the edges.

Cool in the tin, it is too fragile to turn out when it is warm. Dredge with icing sugar when it is fully cold.

This is glorious served with orange fillets in caramel (I used the oranges I took the zest from), with a scoop of Greek yoghurt, or vanilla icecream.

Do try this, and let me know what you think!

Sunday 6 December 2015

Fig Molasses and Orange Madeleines

by Lisa

The theme was Paris. I’ve only ever been to Paris once, and even then it was only the outskirts, and only for an overnight stay, so I didn’t get to explore the food shops. We were on our way to Chalon-sur-SaĆ“ne, and had a long drive ahead of us, so we just didn’t have time.

If we had had the time, I’d have been sure to hunt down some Madeleines. I love these little sponge cakes and, truth be told, I am death to a bag of the Bon Maman ones.

I wanted to make some to take to Cookbook Club, so set about baking.

The plain vanilla ones were first and then, inspired mainly by London Bakes post here, some Fig and Orange ones.

Nice and easy recipe here, which I used just with lemon zest. They are nice, but need more vanilla I think.

The next lot up were the fig ones. I wanted to use up a jar of Fig Molasses that I’d bought from the Turkish Deli in Borough Market. I used it for making a green bean, fig and almond salad from my friend Sabrina Ghayour’s Persiana, and I had quite a lot left.

I added grated orange rind too, because fig and orange goes very well together, and then used wholewheat flour, to make them slightly more toothsome. For once, I didn’t add cinnamon, the fig molasses needed to shine through a bit.

The smell as they were baking felt like Christmas had invaded my house again. Trudged its way through the snow, and climbed in through the window.

I can highly recommend these! (I’ve put them in a box now, so I don’t eat them all.)

3 medium to large eggs

2/3 cup sugar OR 2/3 cup fig molasses plus 1 tbs golden caster sugar)

1 teaspoon vanilla extract

1 tsp orange flower water

1 cup flour (I used stone ground wholemeal)

1/2 teaspoon bicarbonate of soda

2 teaspoons grated orange zest

1/2 cup butter, melted and cooled

Beat the sugar/molasses together with the eggs until it’s well mixed and slightly creamy. This takes around 3-5 minutes. (It does separate a bit, just whisk it back in.)

Whisk in the flour, bicarb, extracts and then whisk in the melted butter.

Leave to stand for an hour.

Heat the oven to 400° F /200° C.

I sprayed my moulds with baking spray, but you can butter and flour them if you prefer. I had one metal tin, and one silicone, so I could alternate them for faster baking.

Fill each little mould 2/3 full. I used a teaspoon, as my mix was quite thick. You can pipe it if you want, but I couldn’t be bothered, if I’m honest!

I baked each set for 10 minutes, and made sure I set a timer. They came free of the moulds very nicely indeed. I think next time I will add a bit more sugar, and use half white half wholemeal flour.


Greek Butter Cookies

by Lisa

I have a cookbook. (Nobody is surprised at this.)
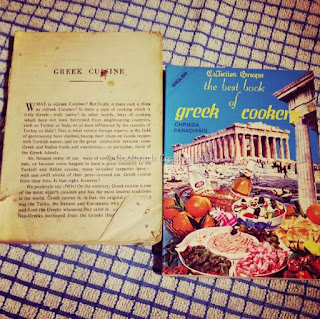
I have 2 copies of the same cookbook, because the first one fell apart.

My Mum used it to learn to cook Greek food for my Dad after they got married, then I found it, and started reading it. It had a cover, back then. One of those 1970s brown ones, all earnest and lentilly.
The back pages came off, then the front cover, and then the book itself started to disintegrate. I put it away on the bookshelf, and it survived 2 house moves, probably by staying hidden at the back of the shelf, sheltered by Delia and Nigella.


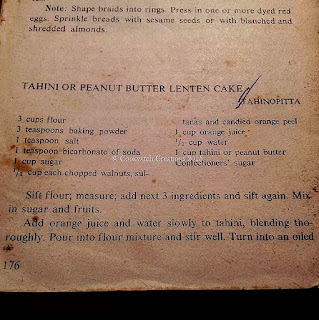
I found it again when I needed a recipe for tahini cake. It had the recipe alright but there was a small drawback.


 Time to see if I could find another copy. Thankfully the wonder that is Abe Books came to my rescue. When it turned up, the cover was a bit of a surprise!


But it’s the same book alright. So tahini cake was made.

My next favourite recipe is the one for Greek Christmas Cookies. We have them at weddings too. Essentially a very buttery shortbread with icing sugar and brandy. LOTS of icing sugar. Sometimes we add almonds, or pistachios too. I’ve had them with a cinnamon walnut mix in the middle, and even rose Turkish delight, which melts to a beautifully soft centre.

The original recipe calls for unsalted butter, bicarb and no added salt, but to my mind that makes everything too sugary and sweet, and possibly a little bland, so I use salted butter (grass fed for preference), and no bicarb as I hate the taste.

This time I wanted them plain and simple. I only had an evening in which to bake, as I needed to take something along to Thane Prince’s cookbook club the next day, and I had all of the ingredients in.

Off I went! Once I’d sorted out the cup measurements. Handy guide here! http://www.butterbaking.com/conversions/

The recipe called for a moderate oven *rolls eyes* so here’s a useful table:


I set my not terribly accurate oven dial to about 165C fan.

Kourabiedes

1 cup soft salted butter (it worked out to 225g)

1 cup icing sugar (I just used my American measuring cup for this one)

1 egg yolk (that meant I got to make meringues later)

1 tbs brandy (I used apricot brandy but you can use orange juice)

1 tsp vanilla or almond extract

1 tsp orange flower water

3 cups plain flour

(You can also add in 1/2 cup blanched and very finely chopped almonds)

1lb icing sugar to dredge (I DID NOT USE THIS MUCH. I don’t think they need it.)

Whisk butter and sugar together until very light and fluffy.

Mix in the egg yolk and brandy, then add the sifted flour a cup at a time and mix it all in.

Bring it together as much as you can then tip out onto a work surface and knead well until the dough is smooth. This is a beautiful dough, very easy to work with. Too easy to eat, if truth be told…

If it’s too soft for shaping, add a little more flour.

The book says to shape into balls, the size of a small egg, but I made mine smaller, maybe the size of a walnut. Don’t worry at all about perfection, make them any shape you want!

Place on a lined baking tray about an inch apart, as they do spread a little.

I pressed each one down with the back of a fork, because I like the pattern, and the ridges hold some icing sugar.

Bake in a moderate oven for 20 minutes.

They will spread a little, puff slightly and then gradually turn lightly golden.

You are then supposed to roll the warm cookies in that 1lb of icing sugar, but I just put them in a box, and sprinkled maybe a cup of it in. It did stick to the cookies, and in some cases it will form a soft buttery layer on top. THIS IS FINE. It is also delicious.


They keep quite well in an airtight box, if you can stop yourself eating them all at once.

If you do want to sneak one, here’s a tip; don’t wear all black.

Sunday 22 November 2015

Regional Baking - Dorset apple cake

Post by Lynn Wickins

There are many recipes out there for this cake, including one I have that was published in the 70's that used white flour, white sugar and lard, with no spices or dried fruit.  This one is credited to Ed Kimber on the BBC Good Food web site.  I was fortunate to meet Ed at a Leith's cookery school event last week and he is charming and knowledgeable, and this cake is quick to make and good to eat.  But not especially exciting to look at!


Ingredients
  • 225g self-raising flour
  • 2 tsp ground cinnamon
  • 115g unsalted butter, diced and chilled, plus extra for greasing
  • 115g light brown sugar
  • 1 large egg, beaten
  • 6-8 tbsp milk
  • 225g Bramley or Granny Smith apples, peeled, cored and diced
  • 100g sultanas
  • 2 tbsp demerara sugar 
  • Method

    1. Heat the oven to 180C/160C fan/ gas 4. Butter and line a deep 20cm cake tin with baking parchment.
    2. Mix the flour and cinnamon together in a large bowl. Add the butter and rub into the flour until it resembles fine breadcrumbs. Stir in the light brown sugar. Beat in the egg followed by 6 - 8 tbsp of milk to achieve a smooth, thick batter.
    3. Add the apples and sultanas and mix. Turn the batter into prepared tin and level out. Sprinkle over the demerara sugar and bake in the oven for 30-40 minutes or until golden and a skewer inserted into the middle comes out clean.
    4. Allow to cool in the tin for 15 minutes and then turn out onto a wire rack to cool further. Best served still warm with custard, or even better with clotted cream.

Saturday 14 November 2015

THAT cheesecake

by Lynne Clark

I'm wandering through my files to see what else is easily popped on here, stuff you have all liked. I think this cheesecake is one of those. It is another recipe from A Greedy Piglet, here for your convenience. It's a lovely thing. Ignore what I say about not putting the poppy seeds on top. Do. They make it a work of wonder.

-----------

Originally written on A Greedy Piglet March 2nd 2011 

I adore cheesecake. Proper cheesecake that is, the baked one, with a light brown crust that breaks to a silky creamy interior. As famously made at Lindy's in New York, and I am sure eaten by Oliver Hardy at some time or another. Well, he was certainly full fat enough.

So for a change of dessert at Christmastime, I made myself this luscious, creamy New York style cheesecake.


I pondered over various recipes, and decided to base this one around Ruth Watson's version from her latest book Something for the Weekend - I am always happy with her recipes, and I picked up this latest book when we treated ourselves to a pre-Christmas stay at her hotel in Orford. It is a great read as ever, Ruth makes me laugh - if you ever watched her on any of episodes of The Hotel Inspector you will know she is blunt as blunt can be - her recipes are just as down to earth.

So here is the original:


I did change it a bit.. I used half Philly and half curd cheese for a slightly less creamy finish (edit Nov 2015: NO NO NO.... unless you like a slightly flakier cheesecake, stick to all full cream cheese. And don't muck about with lower fat ones, they don't work) . I baked the base for 15 mins before adding the cheesecake mix, to make it crisper. And I cooked it at a lower temperature to avoid it inflating - I think the temperature used here sounds too high, I usually cook at gas Mark 3 for about the same time.

Like everyone I judge a cheesecake cooked when it wobbles in the middle without actually sloshing about (you remember... as Nigella put it, “so there is still a hint of inner thigh wobble”). Sometimes it takes longer sometimes less (depends on the gas pressure that day..). As a cheesecake won't deflate like a sponge cake, there is no problem with checking frequently until the wobble is not too squelchy. I have seen a lot of recipes that entail encasing the tin with foil, and cooking in a water bath to ensure that the cheese doesn't inflate and lose its smoothness, but to be honest, it does seem a lot of faff as this comes out perfectly nicely without. I am not trying to win a competition, I just want to eat a cheesecake.

But do please try and let me know if you think it makes a real difference.

Oh, and I added in some lemon juice as well as the vanilla. Because that true New York flavour doesn't come with just lemon, or just vanilla. It needs them both.

I didn't put the poppy seeds on this time (though I have tried them later and they are lovely) (edit Nov 2015: THEY ARE BLOODY MARVELLOUS)  because I wanted to taste the blueberries in the light sauce. This was just fresh blueberries in some melted apple jelly.

So this is my adjusted recipe:

shell:

175g Digestive Biscuits (or thereabouts, don't worry if you are a biscuit or so short)
50g melted unsalted butter

filling:

225g caster sugar
3tbs cornflour
2 tsp vanilla extract
juice of one lemon
750g cream cheese (or cream and curd cheese mixed, I used 50/50) - room temperature, or at least an hour or so out of the fridge.
2 large eggs (or 3 small ones)
1 (284ml) carton double cream

9-10inch / 22-24cm diameter springform cake tin, lined with parchment paper to sides and base.
heavy baking tray
Crush the digestive biscuits (either in a bag with a rolling pin or in a food processor). Gently melt the butter and mix into the biscuit crumbs. Press into the base, and slightly up the sides of the tin. Put onto baking tray and bake for 10 mins at Gas mark 6 until golden and starting to crisp (DO NOT GO AND PLAY ON THE COMPUTER AND LOSE TRACK OF THE TIME, so that you come back to a pile of cinders and have to do it again.)

In the meantime, put everything together in a large bowl and using an electric whisk on low setting, combine until smooth and silky. You don't want to whisk it, you don't want any air into the mix, just to fully combine everything.  If you want to be purist, you can whisk the cheese with the sugar and cornflour first, then add in the eggs, and then the cream and flavourings last. Your choice, but keep it smooth and silky not frothy - a frothy mix makes for a flaky cheesecake.

Tip onto the baked base, and bake in the centre of the oven for around 10 mins at Gas Mark 6, then turn the heat down to Mark 3 and bake for approximately an hour, checking frequently for the degree of wobble for the last 15 mins. Turn the oven off when wobble is to your liking and, with the door ajar, let the cheesecake cool in the oven. If you have a double oven, you can move it to the 2nd oven - that will be warm from the cooking so that the cake won't cool too quickly but not so warm that it will carry on cooking. The top may crack as it cools, but cooling it somewhere warm keeps this to a minimum.

NEW TIP: When you cool the cake, run a spatula round the inner edge first to make sure it isn't stuck to the tin anywhere. Cheesecakes split for one (or all) of several reasons - they may be cooked at too high a temperature for too long, they may be cooled too fast, or they may stick to the tin, and so as they cool and shrink slightly, the place of least resistence is the cheesecake mix in the middle, where it is softest. So it pulls away there. If you make sure there is no cheesecake adhering to the side of the tin, it is more likely to shrink inwards than outwards.

Either serve at room temperature or chill, as you prefer, I like to serve with fresh fruit or fruit coulis.

Hello Thane's Cook Book Club members!

Added by Lynne Clark
 
What a lovely surprise, to wake up to on this most desolate of days to a new place for the recipes that we all want to make after a visit to Thane's club at the beginning of the month.

I thought I'd kick it off by copying my blog post outlining how I make the orange and anise scented gibassiers; there are never, ever any leftovers! 

------------------------

 (first published on A Greedy Piglet October 2013)

Mini Gibassiers are just as delicious as big ones! Do you remember the Gibassiers I made last year after Aldeburgh Food Festival, when I had them at Pump Street Bakery? I only make these in the wintry months, they don't feel right in the summer, with all the berries around there are lots of other things to make, but once the nights draw in and the light fades, they come back into their own.


I made trayfuls of these minis for Thane Prince's Cook Book Club (held every month at the Draper's Arms in Islington.. do come one day and say hello!) where I have been elected to be in charge of the bread etc. for the monthly meetings. This month, we were so lucky, we had Paul A Young come to talk chocolate with us, and the wonderfully knowledgable and kind Fiona Beckett brought all kinds of different dessert wines to match the chocolate. I didn't want to bake something with chocolate in it, as I thought here would be plenty of that from other members of the group, so I decided on these little gibassiers which I thought would complement any chocolate that was around. I changed the flavourings from anise and citrus peel to orange zest alone. And left out most of the orange flower water , replacing that and the water with fresh orange juice. Really really delicious little bite sized morsels they came out.


Interesting point about the flour this time as well. I had popped into our local Romanian delicatessen earlier in the year, searching for the bottles of sour cherries that I know are popular in all the Eastern European countries, and in chatting to the charming Romanian owner, got to talk about flour for sweet yeast doughs.

She recommended a 000 flour that was made in Romania, and is very very finely milled, and that she said was perfect for panettone. I didn't get to make any panettone, but I do now keep the flour in just for brioches and buns like these. It has some additives that obviously affect the way the yeast reacts, but it makes a fabulous light delicate crumb. If you ever see it (I got my last lot in my local Turkish supermarket of all places) get it and try it and let me know what you think.


The recipe is slightly changed from before so I have copied it here and adjusted it for you - don't forget it is a 2 day affair if you decide to give it a go:  

Preferment:
180g bread flour (I used Dove Farm)
110g milk (I used skimmed milk with a fat slug of double cream in it )
half teaspoon Dove Farm instant yeast.

Mix all together thoroughly, leave covered tightly at room temperature overnight. The following morning you will need the following ingredients :  

Dough: Liquid part:
3 x whole large eggs
Olive oil 80 g
80g Fresh squeezed orange juice (roughly the juice of one large orange, zest the orange first to use later)
1 tbs orange flower water (or just leave it out if you don't have it)  

Dry part:
400g oo or 000 flour (I used the Romanian flour above but if you can't get it then any 00 flour or failing that, any plain flour)
100g caster sugar
7g (one tsp) fine salt
15g instant yeast or 30g fresh yeast - I have started to use fresh yeast these days in preference to instant, I think the crumb is softer. If you have a Sainsbury's with a bakery section, ask them you should find they will sell you fresh yeast very cheaply, I pay 20 for 50g at my local Sainsbury's.  

Additions:
70g unsalted butter
finely zested rind of two oranges
120g melted butter
Caster sugar for finishing

Mix the liquids in a bowl and squish in the preferment. It won’t fully dissolve but will be easier to combine with the rest of the dry ingredients.
 Combine the dry ingredients in a bowl and then add the liquid ingredients above. Now comes the fun part. If you have a stand mixer, then you can follow the instructions in the original Fresh Loaf recipe. If not then you will have the sticky fun of kneading it. I followed the instructions here for kneading a la Richard Bertinet.


Some recipes tell you to add the butter in at the beginning. Which makes the kneading much easier, as the butter makes the dough silky.However, we are going for the traditional brioche route, also known as making life nice and hard for ourselves. We are going to add the butter after the initial kneading, so expect it to stay VERY sticky for quite a while in the initial stages. Have a good scraper near you, a bowl of hot soapy water in the sink for emergency, and ignore the phone or the man at the door.

Once the dough is starting to come together nicely, after about 10 minutes of slapping, add 70g of room temperature butter cut into lumps. The recipe says to add it piece at a time, but I decided that this was going to add faff to faff, so it got added all in one go, but dabbed onto the spread out dough, as if making rough puff pastry, along with the orange zest. Then roll up the dough and squish and slap until you have a satiny smooth cushion of dough.

 If you are using a stand mixer, I mixed for 4 minutes on medium speed using the bread hook, and then added the butter in four lots, letting the mixer incorporate each one before adding in the next and adding the zest in with the last lot. Then I mixed for a further 4 minutes on medium until the dough was very supple and shiny. Drop the dough into an oiled container and cover tightly, bulk ferment for 90 mins to 2 hours until fully doubled. Degas the dough by gently folding it in the bowl, remove from the bowl and scale into 35g portions.

Shape each piece into a ball and rest covered for half an hour. Shape each little ball into a tiny batard, or torpedo shape. Flatten down and cut three slits in the sides of each piece Stretch them slightly as you put them on a parchment covered baking tray to proof. They should look roughly like this but without the slits in the middle - there isn't room for the inner slits on the mini size. These in the picture are the bigger 60-70 g pieces that make full sized gibs, I love the tiny ones even better but make whichever size suits you.


Cover with cling film again, and allow to proof for another hour to 90 mins until very puffy and light looking. Glaze with beaten egg mixed with a little milk.

Preheat the oven to 400 F/200 C (350/180 for a fan oven) gas mark 6, and bake the buns for about 10 minutes until golden. Check the underside, you want that to be golden as well, but be aware if you cooking on a silicone tray liner that the bases are not likely to brown underneath, in which case turn them over for a couple of minutes.

I got 30 mini buns out of my mixture, so they were on three trays. The cooking is short enough that just cook the first two trays, swap them about half way to even the browning, and then cook the third tray.

Take them out and put them on a cooling rack with a sheet of parchment underneath the tray. Brush both sides of the bun in melted butter whilst still hot, and then toss in caster sugar to coat. Put back on the rack to fully cool. They freeze beautifully, so don’t worry about having too many.

I keep enough out of the freezer for a couple of days, and heat them for about 5 minutes before serving as I like them best slightly warm, it brings the orange flavours out.

I do hope you give these a go if you haven't yet, they aren't difficult although there are a lot of stages to making them. But they are so good, they are really worth it!